7 Tips for Choosing Wire Cable Connectors
Choosing wire cable connectors is rarely a simple matter of matching wire size. A connector may look perfect. It can still fail under vibration, moisture, heat, or repeated flexing. That risk matters as electrical systems become denser and more demanding. MarketsandMarkets’ 2024 Connector Market analysis estimates continued growth in global connector demand through 2029, supported by automotive electronics, industrial automation, renewable energy, and data infrastructure. More connections also mean more opportunities for weak contact points.
In practical installations, small details often decide long-term reliability. A loose crimp can create resistance and localized heat. An unsuitable housing can allow water or dust to reach conductive surfaces. A connector rated for indoor equipment may not survive a vehicle engine bay. IEC 60512 testing methods address important connector characteristics, including contact resistance, mechanical endurance, and environmental performance. UL 486A-486B also provides widely recognized requirements for wire connectors and terminals, where applicable. However, certification marks alone do not replace correct application review.
The following seven tips explain how to evaluate wire cable connectors with greater confidence. They cover conductor compatibility, current capacity, insulation materials, sealing, locking design, installation tools, and verification testing. These points reflect common engineering practice, but no guide can predict every field condition. That is the uncomfortable part. A specification sheet may omit a critical detail. Installers should confirm temperature, movement, exposure, and applicable regional requirements before approval. A careful choice saves more than time. It can prevent intermittent faults, maintenance visits, and premature equipment replacement.
Understanding Wire Cable Connectors and Their Main Types
Wire Cable Connectors: Understanding the Main Types
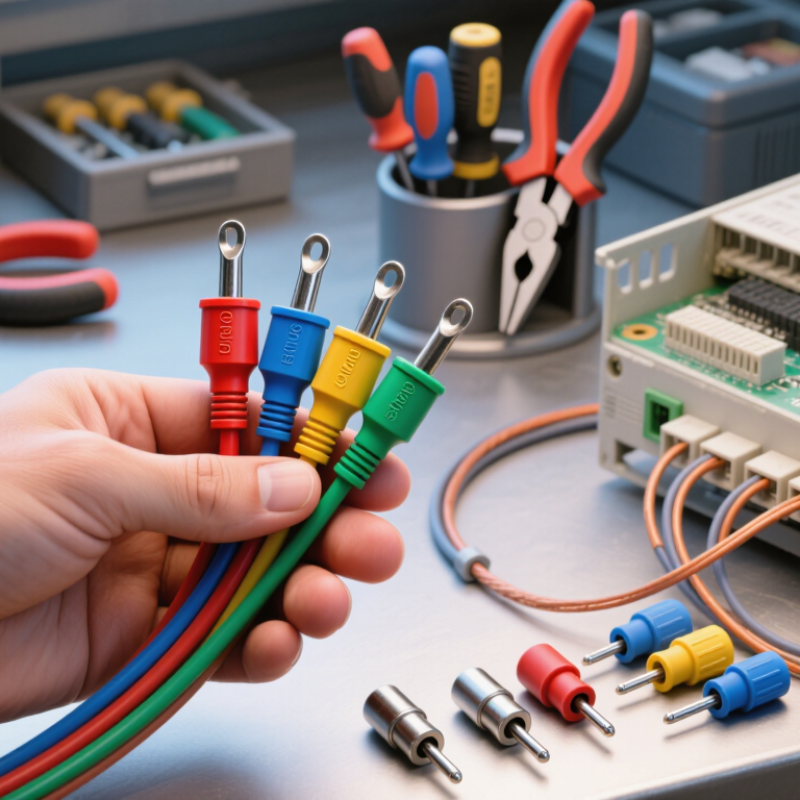
Wire cable connectors create secure electrical and mechanical links between conductors. Choosing the right type begins with understanding how each connector works. Crimp connectors use pressure to join wires inside a metal barrel. They are fast, consistent, and suitable for many vehicle and control-panel repairs. Screw terminals hold stripped wire beneath a tightened screw. They allow easy inspection, but vibration may loosen them over time. Push-in connectors use spring contacts, making installation quick and clean. However, the wire size must match the connector’s rated range.
Tip: Match the connector to the wire gauge and current load.
Other common types serve more specific conditions. Butt connectors join two wires end to end. Ring and spade terminals attach wires to studs or screws. Waterproof connectors use seals that block moisture, dust, and corrosion. They are useful outdoors, though a damaged seal can create false confidence. I have seen installers choose waterproof parts but leave cable entries exposed. The connector alone cannot protect the whole connection.
Tip: Check insulation, temperature, vibration, and moisture exposure before installation.
A reliable connection also depends on technique. Strip only the required insulation length. Avoid cutting conductor strands. Use a calibrated crimping tool when possible, and perform a gentle pull test afterward. For screw terminals, tighten to the specified torque. Over-tightening may damage the conductor. Under-tightening may cause heat buildup. Connector ratings are important, but field conditions can be less predictable. Recheck the choice when cables move, bend, or carry unexpected loads.
7 Tips for Choosing Wire Cable Connectors
Understanding Wire Cable Connectors and Their Main Types
Ingress protection is one practical factor when selecting wire cable connectors. The first IP digit indicates protection against solid objects and dust, while the second indicates protection against water. Confirm the connector’s voltage, current, conductor size, temperature range, locking method, environmental exposure, and installation requirements before choosing a final type.
Selecting the Right Connector Material and Environmental Protection
7 Tips for Choosing Wire Cable Connectors
Selecting the Right Connector Material and Environmental Protection
Choosing a wire cable connector starts with the installation environment, not its appearance. I once selected a plated connector for a sheltered panel, but condensation later caused surface corrosion. That mistake changed how I inspect projects.
Match the connector metal with the cable and surrounding hardware. Copper, brass, stainless steel, and plated alloys behave differently near moisture or chemicals. Check the current rating, voltage rating, and wire size before installation. A loose fit creates heat. That is dangerous. Select seals made for the expected temperature range. Silicone may suit heat, while other elastomers resist oils better. Never assume one sealing material fits every site.
Review the enclosure protection rating carefully. Dusty workshops, outdoor cabinets, and washdown areas need different protection levels. Look for resistance to water, vibration, ultraviolet exposure, and repeated bending. Strain relief should hold the cable jacket, not the individual conductors. Keep the connector away from sharp edges. Use compatible locking parts. Mixed materials can encourage galvanic corrosion, especially in wet conditions. I also inspect the connector after installation, because a perfect specification cannot fix poor workmanship.
Leave room for maintenance. A connector that is difficult to open often gets damaged during repairs. Test continuity and insulation after assembly. Recheck the seal when the cable diameter changes. Specifications are useful, but field conditions can be less predictable. My earlier choice looked efficient, yet it ignored condensation and service access. A second review is usually worthwhile.
Checking Compatibility, Installation Methods, and Safety Standards
7 Tips for Choosing Wire Cable Connectors
Checking Compatibility, Installation Methods, and Safety Standards
Choosing wire cable connectors starts with the conductor, not the connector’s appearance. Match wire gauge, strand count, material, and insulation diameter carefully. Confirm the connector’s rated voltage, current, and operating temperature. Outdoor cables may need resistance to moisture, sunlight, vibration, or corrosion. Check the cable entry size before ordering. A tight fit matters.
Measure twice. During installation, follow the specified stripping length and avoid cutting individual strands. Use the correct crimping tool, torque setting, or insertion method for the connector design. Loose connections heat quickly. For screw terminals, tighten evenly and check for movement with a gentle pull test. For crimp connectors, inspect the compression mark and conductor position. Push-in connectors still require fully seated wires. Never rely on force alone.
Safety standards provide a useful benchmark, but their markings must match the intended application. Review current requirements from recognized electrical authorities and the rules applicable in your location. Verify temperature, flame, ingress, and mechanical ratings when the cable operates in demanding areas. Keep installation records, including wire size, connector type, and torque values. This supports later inspection and troubleshooting. A practical mistake is choosing a connector that fits physically but lacks the right environmental rating. Recheck that decision before energizing the circuit.
Testing the Connection and Maintaining Long-Term Performance
7 Tips for Choosing Wire Cable Connectors
A reliable connector starts with the correct cable size and conductor material. Check the connector’s rated voltage, current, temperature, and installation environment. Inspect the housing for cracks, loose parts, or damaged contact surfaces. Clean contacts matter. Remove dust, oil, and oxidation before assembly. Use the recommended stripping length, then confirm that no wire strands are exposed. A controlled crimp or tightening force gives better results than guesswork. Small errors can create hidden resistance.
Test the connection before putting the cable into service. Use a suitable meter to check continuity and unexpected resistance. Perform a gentle pull test; the conductor should stay firmly attached without stretching. For critical circuits, repeat the test after vibration or temperature changes. A connection may pass once and still fail later. That is worth remembering. Route the cable without sharp bends, crushing, or constant tension. Seal outdoor connectors against moisture, and support heavy cables near the joint. During maintenance, inspect discoloration, corrosion, heat marks, and loosened hardware. Retightening everything is not always wise. Excessive force can damage threads or deform the connector. Record test readings and inspection dates, because memory is an unreliable maintenance tool.